We use cookies to make your experience better. To comply with the new e-Privacy directive, we need to ask for your consent to set the cookies. Learn more.
Cheap Joe’s Art Stuff Art Blog
Tips, Tricks, Thoughts, and inspiration from across the art spectrum.
Citra Solv Collage Paper!

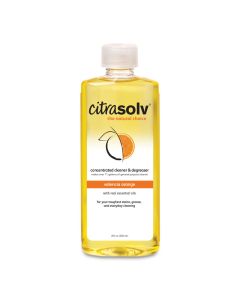
Hi, everyone! Do you guys know about Citra Solv?
Yep, the natural cleaner, degreaser, and solvent!
But I'm wondering if you've heard about using it as an art medium. This week, I want to show you how to create some one-of-a-kind paper designs just using Citra Solv!
I'm using National Geographics because the paper is clay-coated, which lets the ink on the pages dissolve almost entirely. I've tried using this technique with other magazines, but to no avail... Thankfully, it seems like everyone has stacks upon stacks of old Nat Geos hanging around.
To start, you'll need to rip out the covers and ads on the front and the back.
These pages aren't clay-coated and the ink doesn't dissolve at all, so don't waste your time or medium.
You should also flip through to remove any other ads that are hiding in between the pages and you can also unfold these big sheets so that you'll be able to apply the Citra Solv to the entire page.
I started by spritzing each of the pages with a small spray bottle, to really coat the magazine with Citra Solv. But that didn't end up giving me the result I wanted...
So I went back through and used one of these Jacquard Plastic Droppers to give higher concentrated droplets in a more random pattern.
Once I got all the way through, I closed it up and let it sit for about 10 minutes.
When I opened it back up, there were still a few pages that weren't dissolved as much as I wanted them to be...
So I just smudged the images with my finger and then closed the magazine back up to give me a new design!
When I opened it back up, I had a TON of gorgeous pages!
Just look at these beauts! I let them dry a little while longer (about 20 minutes or so in front of my space heater) and then I was ready to use them! Since I had a lot of browns and darker-colored papers, I decided to collage a nice Barred Owl.
First I cut out a branch shape from a page that had some really cool bark-ish texture on it.
Next, I used a darker sheet to give me the tail and part of the body of my owl.
I used another sheet of a similar tone to make the rest of the body and the little footsies.
With a few more shapes cut out from different pages, I had my owl! I wasn't happy with the branch going off the page or with how dark the feet were, so I trimmed and snipped a few more shapes...
And then I was done! I used the same sheet for the talons that I used as part of the face, to keep the colors consistent and balanced. I also added some scraps around his neck to give him a little more dimension. I left the background blank because I didn't want anything to take away from the gorgeous textures I got in my papers!
I still have stacks and stacks of unused pages that I can't wait to use in more projects.


