We use cookies to make your experience better. To comply with the new e-Privacy directive, we need to ask for your consent to set the cookies. Learn more.
Cheap Joe’s Art Stuff Art Blog
Tips, Tricks, Thoughts, and inspiration from across the art spectrum.
I'm Dreaming of a Goof Proof Christmas!

Hi, everyone!
I know most of you out there like to send handmade cards during the holiday season, so what better way than using the easiest kit ever constructed?
The Goof Proof Greeting Card Kit comes with everything you need to make your own one-of-a-kind greeting cards: 10 blank cards and envelopes (with either a deckle edge or non-), 10 pieces of 140lb Kilimanjaro Watercolor Paper PLUS two pieces of 300lb Kilimanjaro and two of Yupo, and enough ATG adhesive strips to put it all together!
So this week, I'm going to show you one of the Christmas cards I'm making using this amazing system!
To start, I sampled some watercolors from my hoard to see which one I wanted to use as my background:

I knew I wanted something dark and cool, so I picked Shadow, Egypitian Blue Hue (formerly Vitruvius Blue), and Payne's Gray from American Journey and Lunar Blue from Daniel Smith. I went with Lunar Blue its crazy granulation was the perfect amount of texture for my wash of a background.
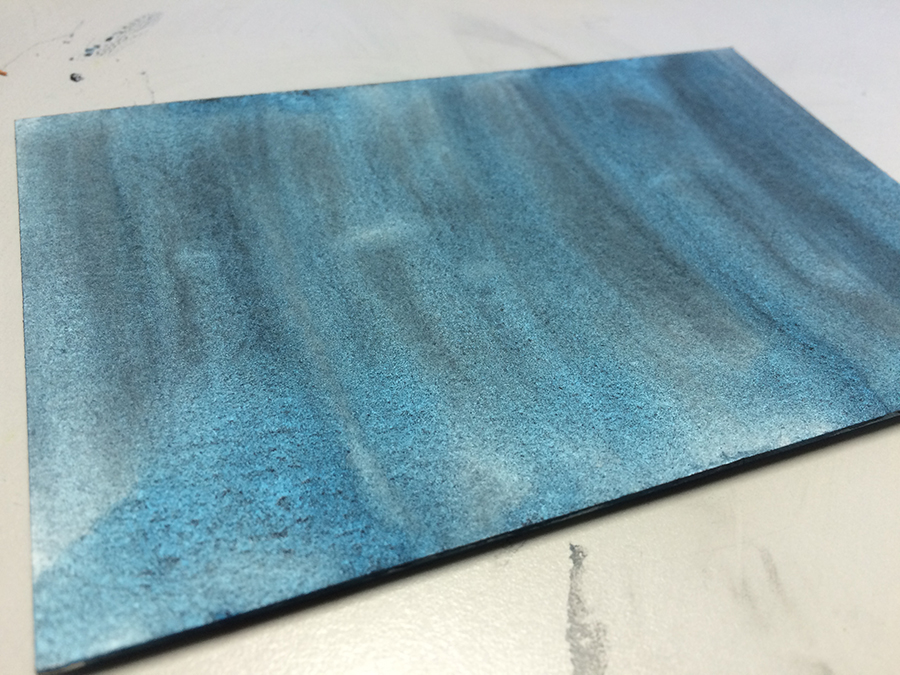
I mean, LOOK at how gorgeous that is!
So while that bad boy was drying, I mixed up some Golden Soft Gel Medium (Gloss) with a couple squeezes of Titanium White Golden High Flow Acrylic inside an Oiler Boiler.

I'm going to be making white glitter fir trees, and since white glitter can come off as a bit transparent, I added the Titanium White to make sure the gel medium would dry white instead of clear and my trees would shine through beautifully!
Tip: If you find yourself struggling with getting your gel medium into the small mouth of the oiler boiler, try spooning some into a ziplock bag, snipping the corner, and then squeezing it out--just like piped icing!

I shook the mixture up real good and did some test scribbles just to make sure it dried white.

And it did!
Since I used the gel medium instead of, say, Elmer's Glue, it also dried slightly puffy, which would give my trees lots of dimension and give the glitter LOTS to hang onto!
With my watercolor wash good and dry, it was tree time!

I started by creating a simple tree shape, just to plan out where my layers of branches would be.

Then filled in my branch layers.

And then REALLY filled in the branches!
There's not a wrong way to do this, either. As long as it's a triangle shape, people will know that it's a fir tree :)

Then I doused it with glitter! Make sure you have something underneath, like a legal pad or another large sheet of paper, to catch excess glitter.

Shake off the excess and bam! A beautiful, snow-covered fir tree!

Next, I drew in a taller, slender companion...

Then a couple more "tree friends" to complete the bunch, and the front of my card was done!

The engaging background and the spectrum of colors given off by the glitter made this simple scene into a stunning work of art!
While my trees dried, I worked on the inside of my card.

I threw in a bit of hand-lettered script with my Brush-Tip Pitt Pen and a short and sweet signature with my .01 Micron to complement the minimalistic cover.

Can't forget to sign the back!

Once the trees were dry, I used the adhesive strips to stick my trees to the front and I was done!

Now this gorgeous card is ready to hand over to my folks!
I must say, this is by far my favorite card I've ever made. And so simple!

Recent Posts


